Sunday 29 July 2012

Recover deleted object using Recycle Bin GUI in server 2012

Hello :)

As in my previous post i have explained how we can recover deleted object using recycle bin feature of server 2008 R2 using Powershel.You can go through that post by clicking here.

Now here we will see how we can recover the deleted object using recycle bin GUI feature of server 2012.

By default AD recycle Bin is disabled in the AD environment, you have to enable it.

Below are few requirements that must be completed to use the feature.

1.  At least one Domain Controller running Windows Server 2012
2.  All Domain Controllers must be running Windows Server 2008 R2 or higher.
3. The FFL must be at minimum of windows Server 2008 R2 functional level.

Here in my scenerio i am having only on DC (i.e server12.com) having windows 2012 installed on it and having FFL and DFL on server 2012.


After you are having the FFL and DFL 2012 , then you can enable to the Recycle Bin GUI feature.

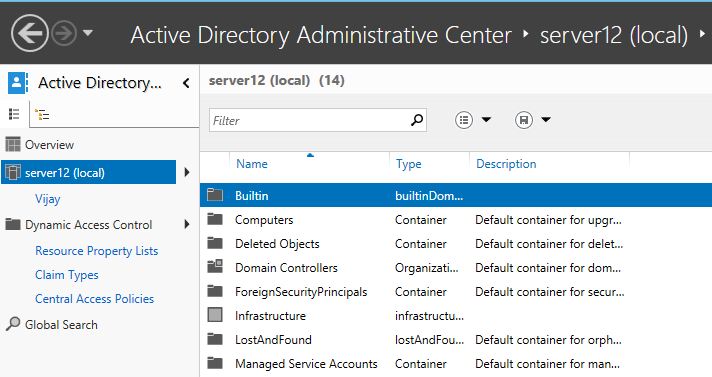
To do this you must go through the Active Directory Administrative Center (ADAC).Just got o ADAC and click on the server name on the left side and you will see  "Enable Recycle Bin" on the right side.
just click on this and it will prompt you to enable this


Note:- You can not disable the Recycle bin once you enabled it.

Once you enable this ,by clicking on the server name , in the middle pane you will see one object container i.e. "Deleted Objects". I have deleted one user i.e. vijay from my AD, so here we will reocver that user.

Double click on the deleted objects container and then you will be able to see all the deleted objects.
Right click on the object you want to restore and then click on restore.


After this process your deleted object will be live in the AD again.


Note:- All the group membership remain same after recovering the deleted objects


G5AX6URBXMM8


Friday 27 July 2012

Downgrade Forest Functional level or Domain Functional Level in Server 2012

Hello,

Today i will share that How we can downgrade the Forest Functional level or Domain Functional level for server 2008 or 2012 .

It is there that revert to the lower FFL or DFL is not possible but in server 2008 and 2012 it is possible.
(FFL- forest functional level) (DFL- domain functional level)

Here in my scenario i have server 2012 with forest functional level and domain functional level "windows server 2012", as you can see below the FF.

dd
As you can see the FFL of the domain server12.com is "windows server 2012 released candidate"
and if you want to add ADC with server 2008 , it will not allow to do so and to add that you need to downgrade the FFL and DFL to 2008.

Now i will use the power shell Active directory module to do this activity.You need to run the following power shell command

Set-ADForestMode server12.com -ForestMode Windows2008Forest

It will ask you if you are sure to perform this task ,press Y as shown below


You can see in the above snapshot that the downgrade is done and even when you will see the the FFL level from the domains and trust it will show you the current FFL is windows server 2008.

Now you need to downgrade the DFL to server 2008.

Below you can see that the server12.com domain has DFL as windows server 2012 .


Now you can follow the same procedure to downgrade the DFL as shown below.You have to run the following command.

Set-ADDomainMode server12.com -DomainMode windows2008domain


Now you will see both of your FFL and DFL are now on Windows server 2008.


Monday 9 July 2012

Windows Server 2012 Dynamic Access Control

Hello Guys,

Back again after a long time.

As you all must be aware about that Microsoft is working on 2012 and launched a version of server 2012

Today I will share one of the nice feature of server 2012 i.e. Dynamic Access Control

What is Dynamic Access Control

It is a new security feature that uses a file-system authorization mechanism that gives you the ability to define centrally managed file-access policies at the domain level which apply to every file server in the domain.
It doesn’t replace the existing NTFS permissions though. .
This security feature is claim based security feature.Claims are Active Directory attributes defined to be used with Central Access Policies. The claims can be set for both users and devices. Microsoft added a new container to the Active Directory Administrative Center to implement this new feature.

To configure centralized file-access policies through Dynamic Access Control, we need to configure the following parts.

1.  Claim Type
2.  Resource properties for files
3.  Resource property lists ( add resource property to global)
4.  Create new central access rule
5.  Create central access policy

Below is the screen shot of all the above mentioned steps.


What is the need


1.  Create simpler authorization models for file based resource
2.  Stop creating 1000s of groups to control access
3.  Classify files
4.  Control access to file based on AD attributes
5.  Deploy the access model


Let's deploy this DAP to have a better understanding of it.

I have promoted a server to a domain controller (not mentioned how to promote a server to a domain controller here) and the server name is server12.com


Configure Claim type for Users: In this step, you will add existing Active Directory attributes to the list of attributes which can be used when evaluating dynamic access control. The user’s department value will be part of the calculation that determines if they have access to specific files.

After login to the DC , you can just open the Active Directory Administrative Center to start configuring the Dynamic Access Policy (DAP).

Click on Claim type and then click on create new  and here I am selecting Department and Country
and the classes here I selected is for User (You can create new one as well)


Configure Resource properties for files :In this step, you will configure the properties which will be downloaded by file servers and used to classify files. Further dynamic access control rules will compare user attribute values with resource properties. You can enable existing properties or create new ones.
Click on resource property and here you can select the existing resource properties or also you can create the new ones, I have selected Country and Department.


Added two values in Department (Finance and ITSupport)


Added two values in Country (Norway and USA)


Add resource properties to global list :Each resource property must be added to at least one resource property list before it is downloaded by file servers. The global resource property list is downloaded by all file servers.


Add both Country and Department here.

 Create a new Central access rule :- In this step, you will create a new central access rule. This is similar to an access control list (ACL) in that it describes which conditions must be met in order for file access to be granted. 

First of all mention the name of the rule and then 
 In the Target resource option under Central access rule , you can add different conditions as mentioned below. (like department exists or country exists)


 In Permissions, select "Use the following permissions as current permissions".

NOTE: This setting enforces dynamic access control. The default setting will only create audit log entry.

Then you need to select Edit button then click Add ,click Select a principal, and then type Authenticated. click OK, In Permissions, check the Full Control check box.
Click on Add condition

Here I have selected :

User department Equals to Resource deprtment
User Country Equals to Resource Country


Create a Central Access Policy:-In this step, you will create a central access policy. A central access policy is a group of rules that are enforced as a unit. A file or folder can have only one central access policy applied to it. 


Just click on CAP and then click on new and then on Add to add the Central access rule.
add the user-resource match rule here

Publish the central access policy with GPO:-In this step, You need to create a new group policy to publish the central access policy.


Go to GPMC and then select your domain and then create new GPO and named it as "Dynamic Access"
In Security Filtering, click Authenticated Users, click Remove, and then click OK. and then click on add and add the file server where you want to implement this Policy.

Right-click Dynamic Access Policy, and then click Edit.  Navigate to Computer 
Configuration/Policies/Windows Settings/Security Settings/File System, and then click Central Access Policy. On the Action menu, click Manage Central Access Policies and click on CAP (the policy you created) and then close the GPMC.

Enable Kerberos Armoring for domain controllers :-In this step, you will enable Kerberos Armoring for domain controllers, which ensures that Kerberos tickets contain the required claims information which can then be evaluated by file servers.

To do this click on Default Domain policy and then click on edit and then Navigate to
Computer Configuration/Policies/Administrative Templates/System/KDC. 
Click "KDC Support for claims, compound authentication, and Kerberos armoring" and enable it.


 Note:- To update the policy you can run gpupdate /force

Configure classification data to the file share:In this step, you will classify the files in the file share by adding and configuring the resource properties.

Here i have created share folder name as "Shares".Right clik on it and then select properties, then classification,


Then you can select the appropriate Country and department entries that must be matched with the user's
attributes in the AD and after getting the successful match, it will allow user to access this folder.

After that go to securtiy permissions>>Advanced tab and then go to Central Policy and select the policy you want to implement on the folder as shown below


After that you can apply and close all the boxes by pressing OK.

Now your DAP is implemented successfully on that folder and now all the users who will match the condition mention will have access to this folder , rest will not have access to this folder.

If you want to test the effective permission on a user you can just right click the folder and go to securtiy permissions>>Advanced tab and then goto Effective permissions tab as shown below and then search for the user for which you want to check the permissions.


Here you can see Rahul is the user that has matched with the defined condition and can access the folder and you can see the permissions with green.